

Historically, Windows has not been the favorite operative system for most developers. 😅 But with the arrival of WSL, things are changing. It allows us to run Linux and Windows at the same time. Therefore, it is possible to run Ubuntu in one window and Microsoft Excel in another. 😍
If you have not seen the post in which I talk about WSL and how to install it, you can find it here.
Now that you have WSL installed on your computer, you may be wondering how do I start using it? 🤔
Hi! I'm Ernesto, and in this post, I will show you how to install, in WSL, the mandatory tools that a web developer needs, like Git or Node. 😀
Table of content
Install Git
To install Git in WSL, run this command:
sudo apt install git
If the distro you have installed is Ubuntu, you'll notice that when you execute the git --version command to check the version, it is not the last one available.
To update to the last version, we need the PPA Ubuntu offers; add it by running the following command:
sudo add-apt-repository ppa:git-core/ppa
Remember that when you use sudo, you will have to enter your super-user password.
Once you added the PPA, check if there is any update and install it.
# Check if there are any updates
sudo apt update

# Install the updates
sudo apt upgrade
Now, if you check your Git version, it should be the last one.
git --version
# git version 2.29.2
Install NodeJS
Al igual que Git, Node es una herramienta indispensable para los desarrolladores web.
Install NVM
The recommended way to install Node in WSL and any Linux distro is through NVM (Node Package Manager).
If you are using Bash, install NVM by running this command:
curl -o- https://raw.githubusercontent.com/nvm-sh/nvm/v0.35.3/install.sh | bash
If you are using Zsh, open the .zshrc file and add the nvm plugin.
plugins=(git nvm)
If you are not sure whether you are using Bash or Zsh, run this command: echo $SHELL
The great thing about NVM is that we can install more than one version of Node and use them as we want.
Install Node
Once you have NVM installed, you can install any version of Node you prefer.
nvm install 15.1.0
By the time I wrote this blog, the last version of Node is 15.1.0.
You can change the version you want to use by running this command:
nvm use version_you_want_to_use
When you install NVM, you also install NPM. Check it by running the following:
node -v
# v14.12.0

npm -v
# 6.14.8
Install MySQL
Before you install MySQL, make sure all your packages are up to date.
# Verificar si existen actualizaciones disponibles
sudo apt update

# Instalar actualizaciones
sudo apt upgrade
Once your packages are up to date, run this command to install MySQL:
sudo apt install mysql-server
You can check if the installation went well by running the following:
mysql --version
# mysql  Ver 8.0.22-0ubuntu0.20.04.2 for Linux on x86_64 ((Ubuntu))
Connect MySQL
Before connecting, we have to run the MySQL service.
sudo /etc/init.d/mysql start
Now you can connect to MySQL.
sudo mysql
If you want to exit MySQL, type exit and press enter
Create a password
It is mandatory to have a password to protect your access to MySQL. To create one, first, you have to connect to MySQL and run this command:
ALTER USER 'root'@'localhost' IDENTIFIED WITH mysql_native_password BY 'tu_contraseña';
Once you have your password, you can connect to MySQL by running this command:
mysql -h localhost -u root -p
You will have to write the password you just created. That is a better way to connect to MySQL.

Connect with MySQL Workbench
In this step, you will see all the magic that WSL can do. You will run an app installed in Windows (MySQL Workbench) and connect it with a MySQL server that is running in Linux. 🤯🤯
If you don't have MySQL Workbench installed, you can download and install it here.
Now, open it, and create a new connection.
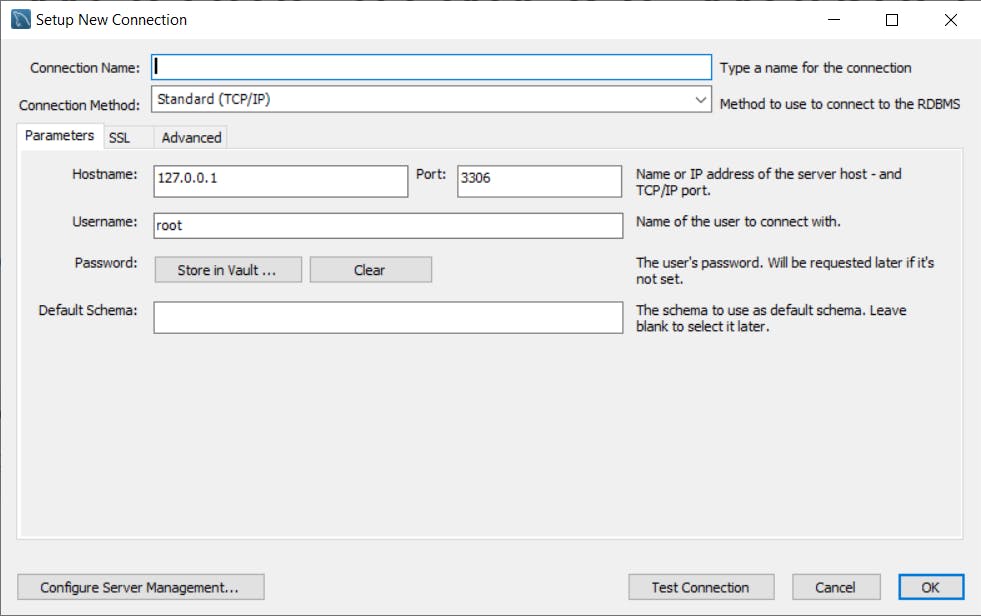
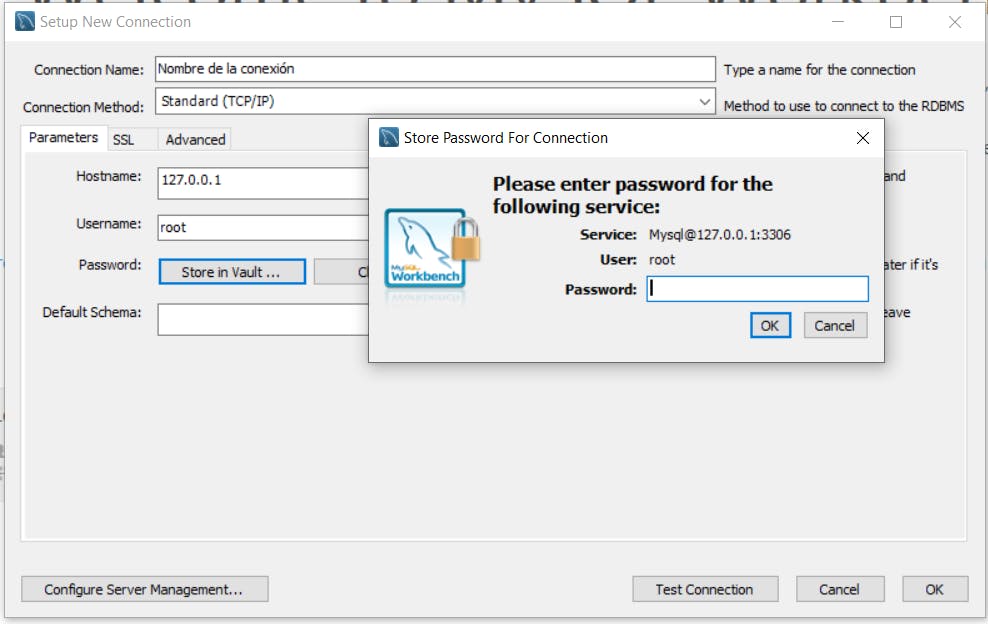
Enter the connection name and the password you created before by clicking the "Store in Vault" button.
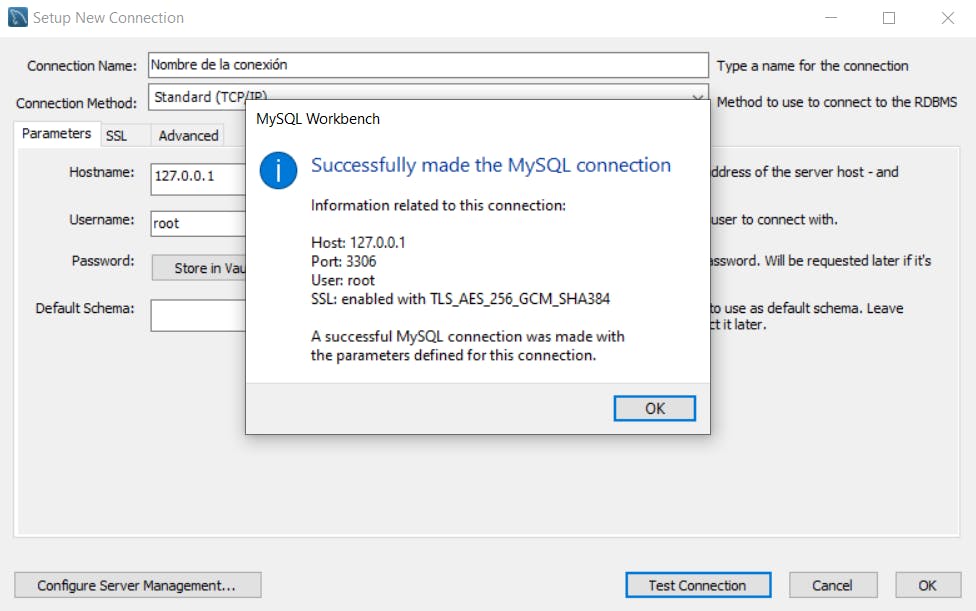
Now, to test the connection, click the "Test Connection" button.
And that's it! You are ready to use WSL with your projects. Just open your favorite code editor and start coding. 👩💻 👨💻
Conclusions
There are a lot more tools 🛠️ that a developer needs, but I wanted to show the basic ones. However, if you have doubts on how to install any of them, I recommend you search how to install it in Ubuntu or any other Linux distro. After all, you are running real Linux. 😉
Thanks for reading! 📖 If this post helped you, please give it a reaction. And If you have any contribution, comment, doubt, or recommendation, write it down in the comments section. It helps me a lot to improve my content. 😃
See you in the next post. 👋